Archives

Entries in iphone (56)

Monday
Sep192011

Myths about iOS, iPad, iPhone & iPod touch

I have the pleasure of working with educators who get to use iPads and iPod touches with students. Wherever I facilitate workshops, I find there are some myths floating around about Apple's iOS devices, and I'd like to clear up some of the misinformation.

iPad, iPhone, and iPod touch do not have user manuals.

Gone are the days when you receive a thick printed user manual with your electronics purchase. Instead of an in-depth guide, Apple includes a glossy folded-up single sheet of paper called Finger Tips in the box. You can hardly call this a user manual. But, if you want a nearly 200 page user manual, you can download one online or in the iBooks app.

You have to have a credit card associated with your iTunes account.

A credit card is not required when you create an iTunes account. Apple would be delighted to get a credit card number from you, but they do provide a way to keep your credit card number to yourself.

First log out of any iTunes accounts you might be signed into. Then simply tap to download any free app in the App Store. When prompted to log into an account, choose Create New Account. When asked for a credit card, choose None. The None option only appears if you create an account by first trying to install a free app. If you try to create an account in any other manner, Apple will not present the None choice and will require a credit card number for the account. Read my previous post, iTunes Account Without a Credit Card

If you have already given iTunes a credit card number, you can log into your account and click to edit your payment information. You should be able to select None for Payment Type.

You can buy an app once and install it on all devices in the classroom or school.

While it is technically possible to purchase an app once and install it on an unlimited number of devices, Apple's Terms and Conditions states:

If you are a commercial enterprise or educational institution, you may download and sync an App Store Product for use by either (a) a single individual on one or more iOS Devices used by that individual that you own or control or (b) multiple individuals, on a single shared iOS Device you own or control. For example, a single employee may use an App Store Product on both the employee's iPhone and iPad, or multiple students may serially use an App Store Product on a single iPad located at a resource center or library. For the sake of clarity, each iOS Device used serially by multiple users requires a separate license.

Individual consumers can sync an app to multiple devices, but Apple expects schools to purchase an app for each and every devices upon which it is installed. In order to buy multiple licenses for apps, there's the App Store Volume Purchase Program. Not only can educational institutions buy in bulk, but the Volume Purchase Program often gives a 50% discount.

The Volume Purchase Program is only for paid apps. Free apps can still be downloaded one time and installed on as many devices as you'd like. If you follow me on Twitter, you know that I often share apps that have temporary become free. Simply document that you downloaded an app to a school account when it was free and you can treat it like any other free app (i.e. install it on class sets of devices). Read my blog post, Things to Know about Apps & Apple Devices, for more about apps in classrooms.

Once you fill 12 home screens of apps you cannot install any more.

It's true: you are limited to a dozen Home screens. You can fill those screen with apps, folders, and web page icons. However, once filled you can still install more apps. The catch is that the apps won't have icons on your Home screen. To launch an app that doesn't have a Home screen icon, you'll need to search for it. Access search by clicking the Home button (or swiping right) while you're on your first Home screen. Note: when you have filled all 12 screens, Safari no longer gives you the option to add a webpage to the Home screen.

You need a Mac to sync multiple devices.

For simplicity, I highly recommend syncing a class set of iPads or iPod touches to one computer. That computer's iTunes Library will have all apps, audio, video, playlists, podcasts, and iTunes U content in it. When you make a change to the iTunes Library, that change is mirrored onto all the devices upon the next sync. 

You can sync multiple devices simultaneously to one computer. There are cartstrays, and cases designed for this task. These syncing solutions all suggest using a Mac for syncing. The problem is that some schools don't allow Macs and some teachers are afraid they won't know how to use a Mac.

Yes, you can use a Windows PC to sync multiple devices. However, Windows computers tend to have problems syncing more than a few devices simultaneously. A Macintosh would be my syncing computer of choice because it does indeed work better (but a Mac can still choke on syncing 20 devices all at the same time). But if a Mac isn't an option for you, a Windows PC will be ok. You will have to babysit it more, perhaps by connecting just a few devices at a time instead of a whole cart at once.

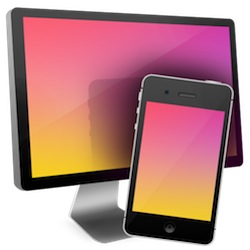
I'm hopeful that syncing is less of an issue when iOS 5 comes out this fall. Wi-Fi Sync will work with Mac or Windows. Apple's website brags:

Wirelessly sync your iOS device to your Mac or PC over a shared Wi-Fi connection. Every time you connect your iOS device to a power source (say, overnight for charging), it automatically syncs and backs up any new content to iTunes. So you always have your movies, TV shows, home videos, and photo albums everywhere you want them.

Apps stay open after you leave them and this drains the battery and slows down the device.

You can view the most recently used apps by double-clicking the Home button. The apps appear at the bottom of the screen. You can flick left to see more apps. All of these apps are not actually running. They appear on the list simply because you launched them lately. Yes, some apps run in the background, like Pandora for playing music or Twitter for receiving notifications. But, most apps do not actually run in the background. They simply stay frozen until you switch back to using them. You can remove an app from the list by touching and holding the app icon until it begins to jiggle and then tapping the red minus button.

I met a media specialist who would manually go through and close all apps that appear in the recents list at the end of each school day. She thought that all of those apps in the list were running and therefore draining the batteries in her school's iPod touches. I can only imagine how much time it took her each day to accomplish this. Alternatively, she could have simply powered down the iPods. When powered back on, an iPod touch's (and iPhone's and iPad's) memory is completely cleared. However, the recent apps list is not cleared, which made this media specialist feel she had to do it manually.

In 2010 Apple's Scott Forstall was asked how you close applications when multitasking in iOS 4. He said, "You don't have to. The user just uses things and doesn't ever have to worry about it."

So, in theory you shouldn't ever have to close apps. One exception when I do close an app from the recents list is when an app is acting weird. Another is when I'm done using my TomTom GPS navigator app. TomTom runs in the background and constantly uses power to detect my GPS location. It will shut itself down after a while, but it can eat a lot of battery power before closing itself. But, most people should never have to worry about it. If your device seems to be slowing down or the battery is draining faster than usual, simply do a power off and power back on instead of worrying about apps that may or may not be running in the background.

For longer battery life you should occasionally drain the battery completely.

We all want healthy batteries in our precious devices. There are certain things we can do to make sure batteries live a long life. For instance, never store your device in a freezing cold or very hot vehicle. Furthermore, be sure to exercise the battery by occasionally discharging and charging it.

Before modern lithium-ion and lithium-polymer batteries, old-fashioned nickel-cadmium batteries experienced a "memory effect" where these batteries would lose capacity over time if they were recharged before they were completely drained. Batteries in your iPad, iPhone, or iPod touch do not suffer from the memory effect. You can charge these devices at any battery percentage and it will not affect its charge capacity.

I have spoken with numerous teachers who have been stressed out trying to completely drain iPads batteries because Apple told them to. Indeed, Apple's page on batteries states, "For proper reporting of the battery’s state of charge, be sure to go through at least one charge cycle per month (charging the battery to 100% and then completely running it down)." Notice that Apple doesn't claim this is for the battery's health; it's simply so the battery meter is more accurate. Personally, I never run down my batteries on purpose. It's great if it happens by normal usage, but I'm not going to drain my battery for the sole purpose of pleasing the battery meter. My meter seems to be pretty accurate even without a monthly drain. On top of that, batteries have a limited number of charge and discharge cycles. Repeatedly draining a battery uses up some of those cycles. 

The screen scratches easily.

Handhelds' screens used to be made of plastic that could scratch easily. Today's devices, including iPad, iPod touch, iPhone, and most Android handhelds, use glass screens. While glass sounds like it would be fragile, Apple uses a material like Gorilla Glass, which is designed to be resistant to scratches, drops, and bumps of everyday use. Watch a YouTube video where someone runs a metal key over an iPad's screen, and you'll see it causes no scratches. Certainly, your device's glass screen can scratch, but not very easily.

Keys and other objects you might think would scratch the screen don't because of the inability of softer material to scratch harder material. Glass falls between 6 and 7 on the Mohs scale of mineral hardness. In general, materials with a lower hardness will not scratch a material with a higher hardness. Most metal is less than 5 on the Mohs scale. But, be careful with all your diamonds around your touchscreen because diamond scores a 10 for hardness.

As a cat owner, this is exciting: Friskies makes Games for Cats. They are free web apps that work well on iPad and Android devices. Friskies says, "The bare glass screen on the iPad stands up to our cat's claws with no problems." That's because fingernails, horns, claws, and other keratins are below 3 on the Mohs scale (and remember that glass is 5). Friskies does warn that a cat's claws will damage add-on plastic film covers.

Some feel more protected by placing those stick-on screen covers over their touchscreens. Often those stickers have annoying bubbles and they make the screen less sensitive to touch. I find them to usually be ugly and a hindrance. Apple does too because in 2010 they removed all screen protectors from their retail and online stores. Now, if it's likely a device will be dropped, then a screen protector just might keep the glass from cracking because of an accident. Furthermore, I know some teachers who love anti-glare screen protectors, particularly when using a device under a document camera.

The bottom line is that I don't want you to feel guilty for not using screen protectors. Your devices' screens are most likely going to be A-ok.

Friday
Apr082011

iPad/iPod/iPhone Accessories, Add-Ons & DIY

One of the sharing sessions at Mobile Learning Experience 2011 was dedicated to accessories, add-ons, and do it yourself projects for mobile devices. I took along many of mine to share.


Disclosure: I do not accept free or special deals on products. However, I make a little money if you follow a product link and buy from Amazon.

Sunday
Feb132011

Speech Input in Dictionary and Translate Apps

Speech InputSpeech input is finding its way into more and more mobile devices and apps. Dragon Dictation for iOS came out in December 2008 and is probably the best way for iPad, iPhone, and iPod touch users to speak into their devices and have it turned into text. The dictated text can then be pasted into other apps. Perhaps future versions of iOS will include speech-to-text across all apps.

iOS's rival mobile operating system, Android, introduced a voice-enabled keyboard with version 2.1. Any time the keyboard is on the screen, Android users can simply tap the speech input icon (or swipe across the keyboard) and then say what they want typed. The device displays the spoken words on the screen.

Android Keyboard

An app that takes advantage of speech input is the Merriam Dictionary app for iOS and Android. Users can search words by voice. This means that you don't have to know how to spell a word to look it up! The app also will pronounce the word, provides synonyms and antonyms, and contains sample sentences. Unfortunately, the free app also contains advertisements.

Merriam-Webster Dictionary App

An even more amazing app that features speech input is Google Translate for iOS and Android. The app translates words and phrases from more than 50 languages. For many languages, you can speak your phrases and hear the corresponding translations. Not only could this be useful for learning a language, but it could be a helpful communication tool for teachers, students, and parents who speak different languages. Translations can be displayed full screen by holding the device in landscape. Tapping a translation gives you the option to copy the text for use in other apps. As the comments to this post indicate, beware when relying on technology to communicate. You may not be expressing what you actually mean or the translation could turn out to be gibberish or offensive.

Google Translate

Of course, for speech input to work your device must have a microphone. Those with older iPod touches without built-in microphones can use Apple Earbuds with Microphone or very affordable mics from Amazon and DealExtreme. (sorry first generation iPod cannot use any kind of microphone). Going forward, pretty much all mobile devices will have built-in microphones because of features like speech input.

Microphone for iPod touch

Sunday
Feb062011

Things to Know about Apps & Apple Devices

I've put together a list of things to know about iOS, apps, iTunes, and the App Store:

  • Some software programs for Apple handhelds (known as "apps") come preinstalled on every device, including Safari for web browsing, Mail for email, and Notes for text files.
  • You can download and install many more apps from the App Store. The App Store can be found in two places: in iTunes on Mac and Windows computers or in its own app on iPad, iPhone, and iPod touch.
  • The App Store is organized in categories, including Games, Education, Photography, and Productivity.
  • In addition to browsing categories, you can search the App Store. In iTunes you can perform a Power Search to filter results to free apps or a specific device. Alternatively, you can browse and search app at AppShopper.com. AppShopper's search results are more detailed than iTunes'.
  • Approximately 34% of all apps are free of charge and another 31% are 99¢. The average price for an app is $2.50.
  • You must have an iTunes account to download apps. For school sets of handhelds, it is recommended you create an account specifically for school. Typically Apple demands a credit card number to create an account. Follow these directions before creating an account and you won't be required to supply a credit card number.
  • Each app downloaded is associated with an iTunes account.
  • You can authorize up to five computers to use an iTunes account. An unlimited number of Apple handhelds can sync to a single computer.
  • A single computer can have more than one account authorized on it. This is different than being signed in. Authorizing multiple accounts allows for installation of apps that may have been downloaded while signed into different accounts. Authorize accounts from iTunes' Store menu.
  • Accounts authorized in iTunes are also authorized on the devices synced to that iTunes app Library.
  • Syncing an individual device to the same computer each time is ideal. Attempting to sync to a different computer than the original can result in data loss and extreme frustration.
  • You can sync multiple devices to one Mac or Windows computer simultaneously. There are options for carts, cases, and hubs to allow for connecting large numbers of devices to one computer.
  • iPad can run almost all iPhone/iPod touch apps. iPhone and iPod touch cannot run iPad-specific apps. Universal apps can run on all three kinds of devices and are denoted in the App Store with a + symbol.
  • Apps are updated periodically. Updates are free and often offer extra features and bug fixes.
  • Some apps require the latest version of the iOS. You can check to see if your device is running the latest release of iOS by connecting it to iTunes, clicking the device's Summary Tab, and click the Check for Update button.
  • Unlike music and movies, you can always re-download both free and paid apps from the App Store free of charge. Be sure you are signed into the iTunes account in which you originally bought the app.
  • Free and paid apps purchased in the App Store app on the Apple handheld are copied to the iTunes Library upon the next sync.
  • Periodically paid apps go on sale for free. For school sets of devices, be sure to document when apps are downloaded for free in case of a software audit.
  • I often share apps you may be interested in on Twitter. Oftentimes the apps I share are temporarily on sale, so download them while they are free or cheap. twitter.com/tonyvincent
  • Twitter users who reference an educational app frequently tag their tweets with #edapp. Searching Twitter for #edapp shows you these tweets all in one spot. Read more about #edapp.
  • Apple has different Terms & Conditions for educational institutions relating to paid apps. Apple expects U.S. education customers to purchase a license for each device a paid app will be installed on using the App Store Volume Purchase Program.
  • Apps can be organized into folders by tapping and holding one app until it jiggles. Then drop apps into existing folders or drop an app onto another to create a folder. Press the Home button when done.
  • Folders and icon positions are individual to each device. Unless you restore a device from the backup of another device, folder and icon positions have to be manually set on each handheld.
  • Deleting an app from the iTunes Library will also remove the app from any device which synchronizes with that library.
  • Delete apps on the device by tapping an holding one app's icon until all icons begin to jiggle. Tap the X next to an app's icon to delete the app. Press the Home button when done.
  • To prevent students from deleting apps, enable Restrictions and turn off Deleting Apps in the General section of the Settings app on each device.
  • To prevent students from logging into their own accounts and installing apps, enable Restrictions and turn off Installing Apps in the General section of the Settings app on each device. However, this will need to be turned off and back on each time you want to legitimately install apps, even through iTunes.
  • Double-tap the Home button to access a list of recently used applications and toggle among them.
  • Got a lot of apps? Tap the Home button while on your first screen of apps to access a search field where you can enter an app's name to launch it.
Saturday
Feb052011

Four Student Response Systems

Class ClickersIf you've got a class set of computers or mobile devices, then you've got a student response system. Response systems sold to schools typically consist of a handheld remote, called a clicker, and software for managing students, questions, and answers. Rather than pay over $1,000 for a set of clickers, a WiFi-equipped classroom that already has iPod touches, iPads, netbooks, etc. (or invited students to bring their own) can turn those devices into a response system for much less.

Google Docs

Google Docs provides a free way to collect responses called Forms. The teacher creates a questionnaire for students to complete. Questions can be multiple choice, true/false, short answer, essay, or a scale. Once the form is completed, Google provides a very long URL that is much to long for anyone to manually type. So, forms can be linked from or embedded in a class web page. Alternatively, a URL shortener like j.mp, bit.ly, or tinyurl.com can be used to create a shorter web address that redirects to the obnoxiously long one. This way students can simply type the short URL in their device's browser to access the questions.

Google Form

The responses are collected in a spreadsheet the teacher accesses online. Google makes it easy to see responses in graphs by simply choosing Show summary of responses from the Form menu. With a Google Form, students are not required to respond at the same time. The questionnaire is online and ready for them any time they ready. For more information about using Google Docs as a student response system, view Radford University's video on YouTube.

Poll Everywhere

Another service that can be used as a student response system is Poll Everywhere. They have a nice Web interface that looks great on a laptop or mobile device. Poll Everywhere can also take responses through text messages. Students text in their answers to the teacher's question using identifying codes. Be aware that Poll Everywhere and Google Docs do not provide feedback to students since there is no way to indicate correct and incorrect answers. While there is a free Poll Everywhere plan for K-12 classrooms, the $50 per year plan gives teachers the ability to see individual student responses and to approve text-based responses before they appear for the whole class to see. Read more about Poll Everywhere.

Poll Everywhere

QuestionPress

QuestionPress (formerly QuickieQ) is a 100% web-based audience and classroom response/assessment tool. This means that QuestionPress is accessible on any Internet connected device. Students can easily find and bookmark their teacher's QuestionPress URL. Alan Degener, QuestionPress' developer, writes more about the service:

QuestionPress is one of the few response web sites that allows you to offer a fully live session where you can control which questions are asked, when they are asked, in what order they are asked, and when and how results are sent to the responders’ screens. Questions can also be served at the responder’s pace with options that allow for the scores and correct answers being displayed upon completion.

Question Press Questions

You can use a prepared question set and/or create questions on-the-fly. Points can be assigned to all questions and QuestionPress can auto-score multiple choice, true/false, yes/no, short answer, fill in the blank, sorting, numeric, “images as answers”, and “check all that apply” problems. Other question types include essay, ranking, and file uploads. Dynamic questions with images can be created using a simple yet powerful WYSIWYG editor, which includes a math equation editor and grapher. Questions can be edited on-the-fly and questions created in a live session can be imported into question sets or used directly in future session. Question sets can be stored, organized and shared with others. Session results can be organized into folders and sessions can be reopened to help consolidate data.

Question Press Session

There are no responder accounts with QuestionPress, so students do not need to remember yet another login and password. Students can use student ids or other codes to protect privacy.

A standard QuestionPress license starts at 35-responders per session. Polling mode increases that limit 10 fold, allowing you to put polls up on your classroom web site. You can also use QuestionPress for homework since it is web-based and can run asynchronously. The email feature allows you to email results to responders when they finish the question set or you can add comments and annotations and send out emails later.

QuestionPress starts at just $24 for an annual 35-responder license. Larger license and multiple session licenses are optional. Group accounts are also available. For more information, a complete list of features, and to sign up for a free trial account go to questionpress.com.

eClicker Host

eClicker HostAn option for iPad, iPhone, or iPod touch using teachers is the eClicker Host app. Priced at $9.99, it's a very affordable solution because no subscription is required. Only the teacher needs the app; students can use any web browser or the free eClicker iOS app. Student devices need to be on the same WiFi network as the teacher's iPad, iPhone, or iPod touch. The app provides a URL for students to type into their browsers. Devices running the optional and free eClicker app automatically detect the teacher's device on the network running eClicker Host. If eClicker Host is running on iPad, up 64 responders can connect. For iPhone and iPod touch, the maximum is 32 responders.

Like QuestionPress, the teacher can control what question is displayed on students' screens. When the teacher moves to the next question, everyone's screens change at the same time to display the next question.

Teachers can compose multiple choice or true false questions on their mobile device or at eClicker.com. Sadly, eClicker does not support short answer or open-ended responses. I don't mind composing the questions on my iPad. I can even include images from my Photo Library or draw one within the app. Alternatively, questions can be edited on a computer at editor.eclicker.com by first creating an account within the eClicker Host app. When done editing, syncing your account updates the on your device. Teachers can even share question sets with one another via Bluetooth.

eClicker on iPad

eClicker has worked well for me for informal assessment. However, it does not have a management system where I can track students over time. It's not a quiz or evaluation tool. If you use eClicker, you'll notice that each question has a timer. I have not found a way to turn off the timer, which can be a distraction. eClicker Host lacks options, especially compared to QuestionPress. But, with fewer features, eClicker Host is streamlined and simplistic. Find out more about eClicker.

Response systems can improve attentiveness, increase knowledge retention, inform instruction, and provide immediate feedback. It's nice to have affordable choices. I've only highlighted on the four systems I've used myself. There are certainly many more. Which one to choose? Fortunately Google Docs and Poll Everywhere can be used for free, and QuestionPress has a free trial. There is no free version or trial for the eClicker Host app. If you have a favorite, please tell us about it in the comments.

Four Student Response Systems

Classroom clicker photo licensed under Creative Commons by Flickr user Kentucky Country Day.

Sunday
Jan022011

What I Bought in 2010

Like I did for 2009, I thought I'd look back on 2010 by sharing technology and technology-related products I purchased during the year. While I think these items are way awesome, it's not about the stuff. It's about what I can do with the stuff--and I have to say, I can do some pretty incredible things!

iPad, iPhone 4, 4th Generation iPod touch
Since I do so many iPad and iPod touch workshops for teachers, I certainly had to purchase these items. I replaced my iPhone 3GS with the iPhone 4 because of the higher resolution display and better camera. I've been using the Apple iPad Camera Connection Kit to copy photos and videos directly from iPhone to iPad. I also use the Apple iPad Case because I like the way it props up iPad for easier on-screen typing. It seems overkill to have all three, but strangely enough, I have been known to use all three devices at once.

Apple Handhelds

Zwipes Microfiber Cleaning Cloths
Touchscreens are a great way to interact with apps, but they are also a great way to smear and smudge glass. Zwipes work better than any other kind of cloth or towel I've used on my iPad, iPod touch, and iPhone. I keep Zwipes all around the house, office, and in my travel bag because I like to wipe my screen clean several times a day. A word of caution: I cut a Zwipe into fourths, thinking that would be a terrific size for travel and to give away at workshops. However, cutting the cloth made lots of microfiber pieces and the cloth unusable for screen cleaning because of the fuzzy mess left behind.

Zwipes

Tekkeon TekCharge MP1800
Since I travel so much, I find that my iPhone's battery charge isn't sufficient to get me from Point A to Point B. The Tekkeon TekCharge MP1800 is a high-capacity battery that juices up anything that charges through USB. I also use it to charge my iPod touch and MiFi mobile hotspot. The MP1800 is also a flashlight.

Battery

AR.Drone Quadricopter
Augmented Reality is all the rage. That's where live images of the real world are mixed with digital information. The AR.Drone is a quadricopter controlled by an app for iPhone, iPod touch, or iPad. It connects through WiFi and relays video from two cameras back to the app. Developers are busy making more apps that interface with the AR.Drone. I absolutely love flying my drone! I've recorded some really cool aerial video and you can find lots of great videos by searching YouTube. I'm taking my AR.Drone to the Mobile Learning Experience in Phoenix in April so that those at the conference can see this flying camera. I've bought an extra battery and charger so that I can fly longer than 12 minutes. I also purchased a Super Bright Blue LED UFO Light Kit for night flying. As much as I love the drone, it is easy to crash and can be expensive to repair.

AR.Drone

Point 2 View USB Camera
If you've got a document camera, then you might not need a Point 2 View camera. If you don't, the Point 2 View makes for a pretty good doc cam. It requires the video to pass through a computer, but for most people, that isn't a big deal since a computer is probably already connected to a projector. The Point 2 View camera is very portable and IPEVO now offer a case (for an extra $40). My Point 2 View has traveled around the country with me as it's an easy way for me to show iPod touch and iPad screen. I really appreciate it's $69 price tag, which is inexpensive compared to a full-sized document camera. Read more about the Point 2 View camera in a post I wrote in April.

Point 2 View IPEVO

Universal Bracket Adapter Mount for Tripod
Now that so many handhelds, like iPhone and iPod touch, can take photos and video, there's a need to steady them on a tripod. The Universal Bracket Adapter Mount for Tripod is an innovative and inexpensive way to attach a handheld to a tripod. It's spring-loaded to fit devices of different sizes and has a hole for a standard tripod. With a mounted camera, I can film stable video, take focused photos, and do time-lapse photography. To go along with the bracket, I bought a new tripod for mobile movie making. The ZipShot Compact Ultra-Light Instant Tripod sets up in seconds. You've got to see the video of the ZipShot being opened!

Tripod

Green Screen and Lighting
I use the green screen technique to give my videos a simple white background. You've probably noticed this effect in my Learning in Hand podcast. In 2010 I bought CowboyStudio Photography 10' X 12' Chromakey Green Muslin Backdrop with Support System and Carry Bag. While it is portable, I leave it set up in my office so it's ready to film when I am. An important piece to doing the green screen technique (called chromakey) is lighting. I light my screen with two work lights and light myself with two softbox lights. Separate lighting for the screen and the subject is important because you don't want the subject casting a shadow on the screen. I keep the green screen looking smooth by using a steamer on it before I film.

Green Screen

Canon Vixia HF S100 Camcorder with Directional Stereo Microphone
I upgraded to an HD camcorder in 2010 and it made a big difference in picture quality. Over the years I've tried all sorts of microphones with my camcorders. In 2010 I bought Canon 2591B002 DM-100 Directional Stereo Microphone for HF/HG Series Camcorders. It's a shotgun mic, so when filming, I don't have to worry about wearing a mic. Directional shotgun microphones are great in classrooms because they pick up sound from in front of them instead of all sounds in the room. Plus, there's no battery or set up to worry about. Note that many camcorders do not have the port where a shotgun microphone can be attached.

Canon Camcorder and Boom Mic

Blue Yeti USB Microphone
Blue makes the popular Snowball USB microphone. In 2010, Blue came out with the Yeti. It looks like a David Letterman-style mic and has settings to be directional or omni-direction. It sounds great and can be used to record or stream one person speaking or multiple people speaking. It is excellent for audio podcasting.

Software
While I'm always on the lookout for free apps, I have bought some apps and services in 2010. Most notably, I paid for Evernote Premium. I think Evernote is a great service, so it's nice I can support them. The main feature I use in Premium that isn't available in the free version is Note History. With this feature, I can go back in time to a different revision of a note. Other software I bought includes iTeleport for iPhone, iPad, and iPod touch. With iTeleport I can see my home computer's screen and control it from anywhere I have an internet connection. Another app for iPad is Air Display. It turns iPad into a second monitor for my MacBook. I've found this is to useful when traveling and working on projects. I move toolbars and pallets to the iPad screen where I can easily tap them and they are out of the way on my main laptop screen. When at home, I like to use my MacBook and my iMac at the same time. SynergyKM is free and is a tool that lets me share a single keyboard and mouse among multiple computers. Another free tool is Dropbox. Dropbox has software for Mac, Windows, Linux, iOS, Android, and more. I can add anything to Dropbox and access it on all my other computers and devices. You get 2 GB of storage for free.

Software

Magic Trackpad
I've always preferred a trackpad to a mouse. Apple's Magic Trackpad has replaced my mouse and I won't go back to having one. It's has a large touch-sensitive area and is wireless.

Magic Trackpad

Mr. Clean Magic Eraser
While I like my Magic Trackpad, I don't really think of it as magical. But, I do think of Mr. Clean Magic Erasers as unbelievable. I use them on my Magic Trackpad and on my MacBook Pro to remove finger grease. Magic Eraser is also effective at cleaning white MacBooks and Apple iPad cases to make them look like new. Don't use water when cleaning electronics with Magic Eraser, because it works well dry. Also, don't use Magic Eraser on your device's screen since it is slightly abrasive.

Magic Eraser

Robots
In 2010 I started having robots do my dirty work! I bought a Roomba 562 Pet Series Vacuum Cleaning Robot. It can be set to vacuum on certain days at certain times, and it does carpet and tile floors. It's a little weird that Roomba does not vacuum in a pattern. Instead, it randomly wheels itself around the room, most likely going over each square foot more than once. My other robot is the Litter Robot LRII Automatic Self-Cleaning Litter Box. Unlike other automatic litter boxes that rarely seem to work, my Litter Robot has worked flawlessly for 5 months. Seven minutes after a cat does his business, the robot's top sphere rotates 200 degrees and back, dropping clumps into a bag in the base. My cats always have a clean box, and I never have to scoop!

Robots

What do I plan to buy in 2011? I'll buy at least one Android tablet or handheld. I predict that Google's Android operating system will become a viable alternative to Apple's iOS in schools in the coming year. By the looks of it, we'll have plenty of quality choices for mobile learning in 2011!

Disclosure: I don't receive free or special deals from companies. I put my money where my mouth is--probably too much money when I add it all up. I do, however, make a little money if you follow a product link and buy from Amazon.

Tuesday
Dec212010

Recommended iOS Apps for 2010

The educator and developer community at iear.org has taken nominations and votes for their 2010 Best App Awards. While nominations and voting is now closed, the list of dozens of nominees is a valuable resource. Nominations were made in early December by those who read I Educational Apps Review's blog. There are nearly 20 categories and each category is divided into elementary and secondary.

You can view the 125 apps categorized in a spreadsheet or view their icons in a widget. Clicking an icon will take you to the app's details page in the App Store. The widget was made using Appsfire's Widget Maker.

Friday
Sep172010

A Word About Free iOS Apps

Did you know that once you purchase an app, you can always download that app again for free? This is handy for apps that have been accidentally deleted or you want to download a purchased app onto a second computer or device.

As you might have noticed, an app can change price. Prices often go up and down. For example, in April I bought the student response app eClicker Host for $24.99. In May, the price was reduced to $9.99, and the app continues to be priced at less than half what I paid. Developers have the freedom to change prices at any time.

To tell the truth, you can live happily without ever paying for an app because a large portion of apps are free. In fact, 30% of the apps in the App Store are free of charge. App developers price their apps at $0 for many reasons:

  • the app makes money from advertising
  • the entire app is an advertisement
  • the app is a "lite" version of a paid app
  • the app does not make money for the developer

Another reason an app may be offered for free is that the developer wants to build buzz for the app. Often apps are offered for free for a day or two before returning to the original price. For example, SonicPics is currently priced at $2.99. I happened to have downloaded the app in April when the app was offered for free for one day.

Remember that app downloads, whether they are free or paid, are associated with a single iTunes account. If an app is for classroom use, be sure to download it using the classroom or school iTunes account so that it can be installed on the devices that use that account.

When you download a free app for use on a classroom set of handhelds, I suggest documenting it. If the school is audited by Apple, you then have proof the app was purchased for free.

There are a number of sources that provide timely information on app price reductions:

  • AppShopper.com and the AppShopper app provide many search options. I like the Popular Price Changes in Education page. You can limit that page to just iPhone or iPad apps. Education isn't the only app category with great apps for students, so you it might be worth checking out Popular Price Changes in All Categories. AppShopper is nice enough to provide web feeds for these price reduction lists.
  • Twitter users frequently share apps they have found on sale. Even if you don't have a Twitter account, you can search Twitter for #edapp free to see if there are any current deals.
  • iTunes lists Top Free Apps in Education (and top free apps for all other categories). Apps that are on sale often climb to the top of the Top Free Apps lists as users grab them before the price reverts back to paid.
  • FreeAppAlert tracks paid iPhone apps that just became free. You can get their alerts via email if you'd like. Similarly there's Free App a Day, but it focuses mainly on games.

If you have any kind of inkling that you might use a free app, I suggest "purchasing" it while it's on sale. You can immediately delete the app if you don't want the app taking up space on your device or in your iTunes library. Like paid apps, you can always download an app you "purchased" for free again from the App Store. This works even after the app has increased in price. In other words, you can download a free app, delete it, and re-download it for free anytime in the future, even if the app is no longer offered for free.

To re-download an app, you will have to click its price in the App Store. This will make it seem like you are going to have to pay for it. However, after entering your password, the App Store will display a message that you have already purchased the app and kindly informs you that you can re-download free of charge.

Obviously, paying attention to price reductions can save lots of money, especially when it comes to class sets of iOS devices.

Sunday
Sep052010

Refine Your Twitter #edapp Search

Twitter has become a valuable tool to discover educational apps. I've written about the #edapp keyword tag, and Episode #22 of my podcast features apps I learned about through the Twitter #edapp tag. Since searching Twitter is now a part of my daily routine, I thought I'd share some search tips.

When you use the twitter.com website, you can save a search. Login and input your search into the box on the right side of the page. On the search results page, click Save this search. The search text will appear on the right side of the page under Saved Searches each time you're logged in. You can click the saved search to see the latest results without having to retype the search.  Your Saved Searches also appear in many Twitter apps for handy access. 

Before you save your search, consider refining it. You can refine the #edapp search to produce results that are more useful. One thing you can do is add more tags to the search. I've added #iear to my search. #iear is the tag used by the I Educational Apps Review community. I've also added #slide2learn. Slide to Learn 2010 was a conference in Australia devoted to Apple's handhelds and the conversion continues on Twitter. To have your search display results from all three tags, enter the following into the search field (be sure to capitalize OR):

#edapp OR #iear OR #slide2learn

Retweets are when someone repeats someone else's Twitter update. Retweets are a way for users to give credit to the original author and to repeat the information to their own followers. Most of the time retweets start with RT. I often look out for RTs because these are the tweets that someone thought were so important that they were worth repeating. However, retweets can be annoying when reading through the results of a Twitter search because you find yourself reading the same tweets over and over. You can omit retweets from your search results by adding -RT to your search string. I've refined my search to:

#edapp OR #iear OR #slide2learn -RT

Just as you can omit retweets, you can use the minus sign to exclude tweets that contain certain words and tweets from specific users. For example, I do not want tweets from the Twitter username _EducationApps_ to appear in my search results. So, I type a minus in front of _EducationApps_ in my search string so that tweets from this user do not clutter my results:

#edapp OR #iear OR #slide2learn -RT -_EducationApps_ -KnowPro

I can, of course, refine my search string even more. As I read through my search results, there will probably be more users I want to remove from my results and perhaps more keyword terms I want to add. 

To sum up, instead of simply saving a search for #edapp, you can refine your search string so that you are one click or tap away from reading tweets that are of interest to you.

Thursday
Sep022010

Learning in Hand Podcast #23: Collecting & Organizing Voice Memos

Learning in Hand Podcast Episode #23: Collecting & Organizing Voice Memos explains how to sync voice memos from an iPod, iPod touch, or iPhone. Using Smart Playlists in iTunes, see how students and teachers can sync and automatically organize recordings. This process is essential in classrooms where teachers collect reading fluency samples, student reflections, and podcast segments.

Download, watch on YouTube or Vimeo, or view in iTunes all 6 minutes 12 seconds of Episode #23 for tips, how-tos, and ideas for collecting and organizing voice memos.

Subscribe in iTunes

RSS Feed

Download the handouts mentioned in the episode:

Syncing with iTunes Handout
Emailing to Posterous Handout

Transcript:

This is the Learning in Hand Podcast. I'm Tony Vincent and this is the show where I share tips, how-tos, and ideas for handhelds in teaching and learning. Episode 23, “Collecting and Organizing Voice Memos” recorded August 2010, happens now!

iPod, iPod touch, and iPhone have the the ability to record voice memos. If your iPod doesn't have a built-in microphone, you can attach one like the Blue Mikey, Thumbtacks, or earbuds with mic.

I covered lots of information and uses for voice recording in Episode #14. There are many occasions where teachers want students to record audio. Whether it's to assess reading fluency, share reflections, record segments for a podcast, document a field trip, record a musical performance, or archive a discussion or interview, the teacher will most likely want to transfer the recording from the device to computer for listening and sharing.

Voice Memos can be transferred to iTunes by syncing. When synced, a Voice Memos playlist will appear if you don't already have one. All recordings are placed in this folder. By default, recordings are named by the date and time the recording started.

Once copied to iTunes, the recording is in two places: iTunes and the handheld. If you delete a voice memo on the handheld, it isn't deleted from the Voice Memos playlist in iTunes. But, if you delete a voice memo from iTunes, it is deleted from iPod touch the next time you sync.

That Voice Memos playlist isn't well organized. All you is see the date, time, and length of the recording. This is no good for the teacher who is collecting reading fluency samples--or collecting any kind of recordings. I'd like to show you how to use Smart Playlists in iTunes to automatically sort Voice Memos into playlists for each student. This makes it easy for teachers and students to find their own work.

First, set up a Smart Playlist for each student:

  1. Choose New Smart Playlist from the File menu.
  2. Set the rule to Artist contains and the student?s name. Click OK.
  3. Complete the steps above for each student.
  4. For each smart playlist, click View Options from the View menu. Remove all checkmarks except Artist, Time, and Comments.
  5. When a voice memo is added and Artist is changed to the student?s name, it will automatically appear in the student?s smart playlist.

So then here's how it works:

  1. A student records using the Voice Memos app on iPod touch. The student should say his or her name at the beginning of the recording.
  2. Connect to the computer. The recording should appear in iTunes? Voice Memos playlist. You may have to click Yes if a dialog box appears asking if you would like to copy voice memos to your iTunes library.
  3. Select the Voice Memos playlist.
  4. Click View Options from iTunes? View menu. Checkmark Artist and Comments and click OK. Also select as List from the View menu. (These actions only have to be done once).
  5. Play the recording and listen for the student?s name. Press Pause and click the recording?s Artist. Change the Artist to the student?s name. Be consistent about spelling and whether you use last names or initials.
  6. Optionally, click under Comments to add any additional information about the recording.
  7. You may delete the items in the Voice Memos playlist after you have added Artist information. This way the Voice Memos playlist shows only recordings that have not yet been tagged with a student?s name.
    You can place your smart playlists into a folder. Create a folder by choosing New Playlist Folder from the File menu. Name the folder. Then drag and drop each student?s playlist onto the folder. This is really handy for computers that are shared among multiple classes.

Having sorted recordings is helpful for collecting portfolio artifacts, grading, and easy access for students to incorporate into their projects.

There are of course variations to the process I've shown you. For example, if only one student uses each iPod, you can name each iPod the same as the student. When synced, the iPod's name is shown in the Artist's field and will automatically sort without you having to listen for a name.

Another way to collect and organize recording is to have student email from their iOS handheld to Posterous. Watch episode #21 for more info. At learninginahand.com/23 you'll find a handout with the steps for using Posterous for collecting student-made recordings. You'll also find a handout with the steps for setting up Smart Playlists like I've shown in this episode.

That's it for Episode 23. For a transcript and much more about iPods, iPads, and podcasting, click on over to learnininginhand.com. Thanks for watching!

Friday
Aug272010

App Store Volume Purchase Program Explained

Volume Purchase Program IconApple has recently updated the Terms and Conditions for iTunes and the App Store. In addition, the company has announced the App Store Volume Purchase Program. In the past Apple had no mechanism for downloading an app more than once, so schools would purchase an app one time and distribute it to all their iPod touches, iPads, and iPhones. This arrangement made app purchases for class sets of handhelds inexpensive but was not properly compensating app developers.

The new App Store Volume Purchase Program requires schools to follow Terms and Conditions that are different from the Terms and Conditions for individual consumers. Apple even reserves the right to audit purchases to make sure that schools are following all of the usage rules for educational institutions, including purchasing activation codes for each device onto which an app is installed.

In the Terms and Conditions and in the Volume Purchase Program Frequently Asked Questions, Apple describes the process of ordering vouchers which can be used to purchase activation codes. While schools with class sets would buy activation codes for each of their handhelds, only one code would be redeemed if all handhelds are synced to the same computer. The remaining activation codes would not be redeemed, but kept in case of an audit.

Jim Siegl made a useful flowchart that visually explains the process:

Volume Purchase Program Flowchart

  1. Program Facilitator creates a quote for a one or more Volume Vouchers for a set dollar amount in $100 increments.
  2. This request is routed to the district Authorized Purchaser who approves the quote and places the order.
  3. The voucher is sent to the Program Facilitator via mail.
  4. The Authorized Purchaser receives the Voucher and send the voucher to the Program Facilitator via internal mail.
  5. Using a New Apple ID created for this purpose, the Program Facilitator searches for and purchases apps in
    variable quantities, up to the dollar limit of the voucher amount and billed accordingly.
  6. The Program Facilitator will receive an email with a link to a dashboard, now populated with app-­‐specific codes. These codes can be distributed to users for redemption at the App Store.
  7. The Program Facilitator distributes the app specific codes to the individual that requested them.
  8. The requestor redeems the codes in one of three ways (assume 30 iPods)
    • a. One code is redeemed to a single iTunes account, iTunes is activated with that account on up to five 5 computers. The 29 remaining codes are kept on file in the event of an audit.
    • b. 30 codes are distributed and redeemed against 30 school managed iTunes accounts.
    • c. 30 codes are distributed and redeemed against 30 student managed iTunes accounts. App becomes property of the student.

As you can gather, the process is complicated. No more can teachers with class sets of Apple handhelds simply purchase an app in iTunes and sync. Now the teacher must work with the school district's Volume Purchase Program Facilitator to acquire a voucher and activation codes. Jim has written more about the intricacies of the Volume Purchase Program and step-by-step instructions on the IEAR wiki.

As part of the program, individual app developers have the option to offer up to 50% discounts on purchases of 20 or more of the same app. You won't see the discount in the App Store itself. You'll have to search for the title of app on the App Store Volume Purchase Program page. For example, when I search for SonicPics, I can see pricing for 1-19 units and for 20+ units.

SonicPics VPP

For a class set of 30, it would cost about $45 to purchase SonicPics for each handheld. In the world of desktop software, that's not bad. However, it's still very pricey compared to the $3 it would cost before the Volume Purchase Program went into effect. The best way to take advantage of the power of Apple's handhelds is to equip them with multiple apps, which will add up very quickly. Not only will the Volume Purchase Program be costly when buying many different apps, but it also requires schools to keep documentation in case Apple decides to do an audit.

I think the extra cost and steps to purchase apps for schools will greatly curtail educational app purchases. Some good news is that the Volume Purchase Program is only for paid apps. Free apps can be downloaded immediately without going through the process outlined in the flowchart. It's reassuring to know that 30% of apps in the App Store are free and you can search the App Store for only free apps by conducting a Power Search.

Power Search for free apps

With nearly 300,000 items in the App Store, there's a good chance you'll find a free alternative to a paid app. For instance, searching for Digital Storytelling gave me a great free alternative to SonicPics called Storyrobe.

Storyrobe Result

Often apps are offered for free for a limited time. You can find out about these deals by searching Twitter for #edapp and using sites like FreeAppAlert and AppShopper. When downloading free apps, educators should document that the app was free. This way if the app does become a paid app in the future, there is proof the app was properly acquired.

Judi Epcke, Scott Meech, and I discuss the Volume Purchase Program in Episode #3 of the IEAR podcast. The three of us were confused and frustrated by Apple's new process. Hopefully as more schools transition to using the App Store Volume Purchase Program, we'll know more about the benefits and limitations of the recently developed rules for purchasing apps.

Thursday
Aug262010

Hurry! Free eBooks from Kaplan

Kaplan Publishing is offering 100 free eBooks in the iBooks Store. To see what books are available, you first must download the free iBooks app (which requires an iPad or iOS 4).

Launch iBooks, tap Store, tap the Featured tab, and tap the ad for Kaplan's free books, or go to tonyv.me/kapfree in mobile Safari. You are taken to a page where you can see the free books in the categories of College, Graduate, Law, Medicine, Nursing and Education.

Free books include in the Education category include First Year Teacher, Sharp Vocabulary, Sharp Writing, Kaplan 101 Biology Practice Questions, and SOS: Stressed Out Student' Guide to Handling Peer Pressure.

The books are free until August 30, 2010.

If you'd like to be in the know for timely deals on eBooks and apps, follow me on Twitter (username tonyvincent) and/or search Twitter for the hashtag #edapp.