Plan a Better iMovie Trailer with These PDFs
When you begin a new iMovie project, you have a choice of creating a movie or a trailer. A trailer follows a template to create a Hollywood-style movie advertisement. iMovie for iOS has 14 trailer templates, and each has its own musical score and graphics. To make your own trailer, choose a template, insert your text, and fill each shot with a video or photo.
Each template has a different number of text screens and shots. Each shot is typically on the screen for only a second or two, so a one-minute trailer requires about two dozen shots.
Students and teachers are making trailers to do things like demonstrate their learning, explain vocabulary words, document experiments, preview novels or textbook chapters, summarize historical events and promote school activities.
Here are a few trailers made by teachers and students. Next to each one is the iMovie trailer template it uses.
- My Dream Destination - Italy uses the Expedition template.
- Verbs uses the Superhero template.
- Properties of Ionic Compounds uses the Adrenaline template.
- The Giver Book Trailer uses the Adrenaline template.
- Project-Based Learning uses the Swashbuckler template.
- Stylus Status uses the Retro template.
Because trailers are so short, the information you convey has to be concise. iMovie’s templates do not leave much room for text. And, the more you write, the smaller the text becomes and harder it is to read.
iMovie provides an outline and storyboard for each template. They are useful and necessary to make your trailer. However, I have found they can be limiting. iMovie’s outlines have some suggested text and also show what kinds of shots to include (landscape, closeups, wide, action, etc). I find that those suggestions muddle my planning process. I don’t have to use their suggestions, yet when I see them, I’m tempted to follow their example, which stifles my own creativity.
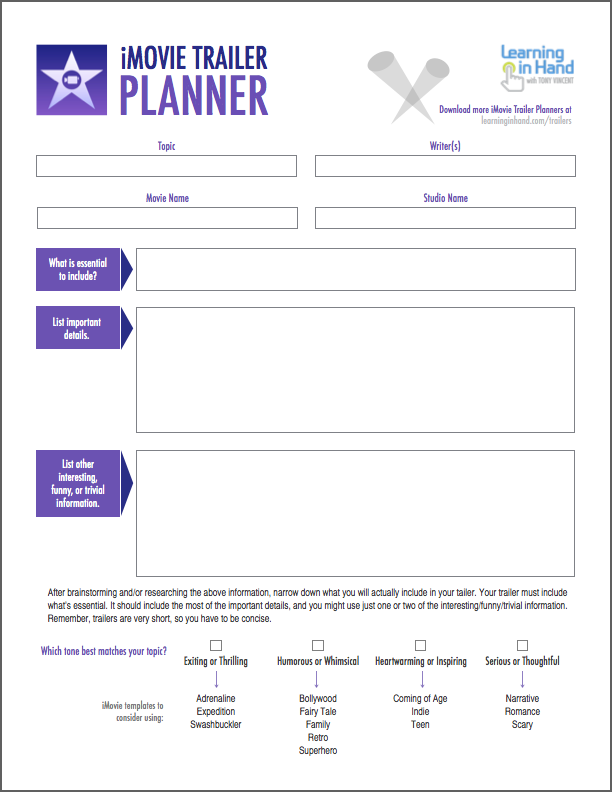
To help plan trailers with more original text and shots, I’ve created a fillable PDF for each template. I’ve omitted iMovie’s example text and shot descriptions so that you don’t have any preconceived ideas of what to write or show in your own trailer.
Each PDF is fillable, so you can open in an app like Adobe Reader or Preview and easily add your own text. It’s up to you if you’d rather draw in the shots or simply type in what you plan for each shot. In classrooms, students will probably make trailers in pairs, so if each has an iPad or laptop, one student’s device could have the planning PDF and the other could use iMovie. Of course, you can always print the PDF before or after it is filled out.
I’ve made fillable PDFs for all 14 trailer templates that are included in iMovie for iPad, iPhone, and iPod touch:
- Adrenaline
- Bollywood
- Coming of Age
- Expedition
- Fairy Tale
- Family
- Indie
- Narrative
- Retro
- Romance
- Scary
- Superhero
- Swashbuckler
- Teen
iMovie for Mac has 14 additional templates, and here are their fillable PDFs:
- Action
- Adventure
- Blockbuster
- Documentary
- Epic Drama
- Film Noir
- Friendship
- Holiday
- Love Story
- Pets
- Romantic Comedy
- Sports
- Spy
- Supernatural
Before using one of the PDFs above, it’s helpful to brainstorm what the trailer might include and then narrow down the content to essential and important details. So I created another fillable PDF. This one is designed to help with brainstorming and/or researching possible content for the trailer.
After brainstorming and/or researching, the next step is to narrow down what content will actually be included in the tailer. The trailer must contain what’s essential. It should include as many of the important details as possible, and maybe just one of the interesting/funny/trivial information. Remember, trailers are very short, so you have to be concise.
Want help with making a movie trailer? Visit Apple’s website for iMovie for iOS (iPad): Overview: How to make a trailer and Create a trailer in iMovie 2013 for Mac. Of course, you can always search YouTube for how-to videos.
Before you get to planning your next trailer, here are some tips:
- Use as few words as possible. Trailers are fast-paced and text is never on the screen for very long.
- Shoot or choose photos and videos in landscape (horizontally). Vertical videos and photos will have black bars on the sides of the screen.
- Need to include more text in your trailer than what the template accommodates? Use Skitch, Phonto or some other app to place text on top of an image. Splice for iOS is a great choice if you want to put words on top of a video (and you can of course do this in a regular iMovie project).
- Looking for copyright friendly images? Use Haiku Deck. Insert the image you want into a Haiku Deck slide and take a screenshot. Don’t forget to give attribution for the photo.
- Speaking of Haiku Deck, that’s another great choice for putting words on an image. Simply take a screenshot of a slide you’ve worked up in Haiku Deck and use that in your iMovie trailer project.
- Movie trailers follow a very specific format. Each shot is on the screen for just a second or two, and never longer than 4 seconds. So if a movie trailer doesn’t fit your content, you should probably choose to make a regular movie project.
- There are other apps that can scaffold your movie-making by providing a format to follow. These include Directr and Videolicious.
- iMovie comes free with a Mac and you might be able to get iMovie for iPad for free. iPads purchased after September 1, 2013 and running iOS 7 or later are able to download iMovie at no cost. Read how this works. Sorry, iMovie is only available for iOS and Macintosh.
In case you were wondering, I created the PDFs using Pages and then used the Create Forms Fields for Page feature in PDFpenPro for Mac.
Update: Patrick Valois has translated the PDF planners for iMovie for iPad into French. Download from his Google Drive.


