
Spruce Up Your Centers with Technology

Learning in Hand Show #31 is about giving your learning centers or stations a makeover. The collection of activities teachers provide their students at a center can be enhanced with technology, even if there’s only one computer or tablet available. Watch the video to learn about some of the websites and apps that can help you set the course of the center, provide content, support creativity, and capture responses.
View the 20 minute video on YouTube, on Vimeo, in iTunes as a podcast, through RSS, or as a download.
Video Transcript
This is Learning in Hand! I am Tony Vincent and this is the show where I share tips, how-tos, and ideas for using today’s digital tools for teaching and learning. Episode 31: Spruce Up Your Centers with Technology, recorded May 2015, happens now!
Let’s give your classroom learning centers or stations a makeover! The collection of activities teachers provide their students at a center can be enhanced with technology, even if there’s only one computer or tablet available. I’d like to tell you about some of the websites and apps that can help you set the course of the center, provide content, support creativity, and capture responses. There are free versions of everything I’m about to show you, so you can get to retooling your learning centers right away! I created a handy graphic with clickable links to these resources. You can find it at learninginhand.com/centers.

Set the Course
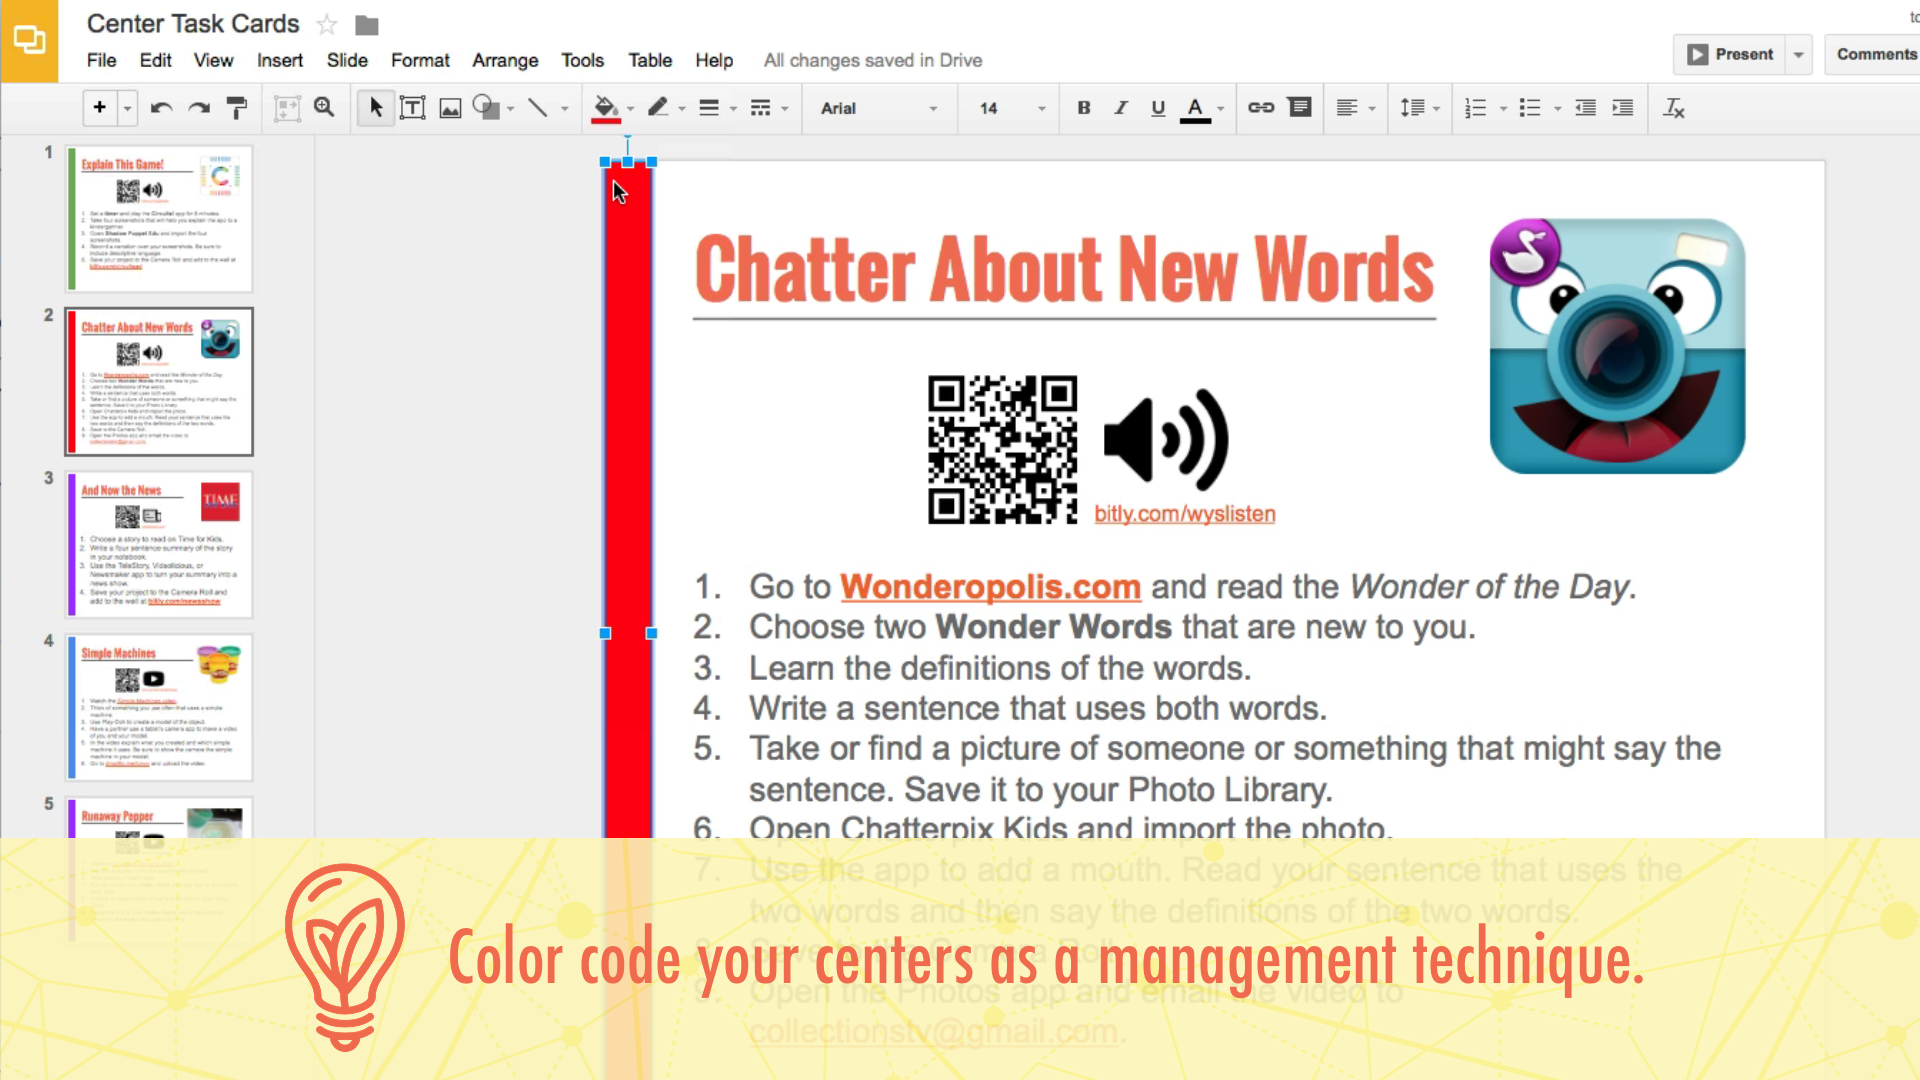
Get students onboard with the center by providing clear expectations and directions. It can be handy for students to have directions printed on a task card or menu board so that they can easily refer to them. You can make your own task cards in PowerPoint, Keynote, Word, Pages, or Google Slides. For inspiration, try searching Google for task card templates.
[Kristen Wideen has taskcards for her iPad stations: mrswideen.com. Monica Evon shares iPad choice menus: mrsevonsthirdgrade.blogspot.com]
Try another Google search for PowerPoint borders or frames. Even if you don’t use PowerPoint, you can import these into other software.

If you plan to print your task cards from slideshow software, change the Page Setup to be the same size of a piece of paper since these will be printed. [11 inches by 8.5 inches]
If you want to keep your task card electronic, I think Google Slides is a great choice. You can easily share the link to your slides. That link can be bookmarked or the slides can be embedded on your own website. The beauty of this is that you can reorder, renumber, or rename the slides to change up the centers and your weblink or website will be immediately updated, with no need to relink or paste new embed code into your site.
How would you like to give verbal directions to students? You can include a voice recording on a task card, whether that task card is online or printed. You can easily record audio online using Vocaroo. Recording into Vocaroo doesn’t work on mobile devices, but just about any mobile device can play back a Vocaroo recording.
After recording, you can save it online. Vocaroo provides a web address you can use for playback. Anyone who visits the link can listen to what you just recorded! You can copy and paste that link into your task card on a Google Slide. When a student clicks, a new window to Vocaroo opens.
If you print this slide, the hyperlink won’t work on paper, of course. So, instead, get the QR code for the audio recording. Drag and drop or copy and paste this into the task card’s slide. When printed, students can use a QR code reader app like i-nigma to scan the code, which will then open a web browser to the Vocaroo recording.

While students on laptop and desktop computers that have webcams can scan QR codes using the website webqr.com, it’s probably better to simply provide a web address that is easy to type. This address is not easy to type. I suggest using a URL shortener like Bitly to make web links easier to type. Sign up for a free account so that you can paste a complicated web link into a “bitlink.” After pasting the URL, choose to customize the link. Enter something easy to type and spell. Avoid ambiguous characters like 0 and O, 1s and Ls, and keep everything lowercase. It might take a few tries to get a customized bitlink that is not already taken. [Bitly links might be blocked at your school, so be sure test it first.]
Want to personally give directions by video instead of just audio? Film yourself and upload the video to YouTube, Google Drive, or Dropbox. Be sure to share the video publicly and copy the link. Paste the link into a QR code generator (my favorite is goqr.me) or make it a bitlink for easy typing. You can do this with any video, so maybe you want to use a document camera stand so that your video includes a demonstration. Or use apps like Adobe Voice or Explain Everything or a website like Pixiclip to create slideshows and screencasts. Get the video online and paste the web address into a QR code generator or into Bitly.

Another way to provide directions is to use a Snapguide or Learnist board. These sites and their apps are designed to make it easy to give step by step directions, which can include hyperlinks, photos, and videos. Each guide or board you create has its own web address, so if you use this at a center, you can create a QR code or bitlink for it.
Whichever way you choose to set the course for your center, remember that directions should be clear and concise. Write or speak in student friendly language. Set clear expectations so that students can work without needing to interrupt the teacher, who is probably working with other students. Above all, get students excited for what they are about to learn and do at the center.
Provide Content
There are a lot of sources of digital content you might incorporate into a center. For instance, you might have students listen to a story at Unite for Literacy. This website works on desktop and mobile web browsers. Unite for Literacy as dozens of free storybooks for students in primary grades. Students can click to hear the narration for each page. Each storybook has its own URL, so you could make a link or QR code that goes directly to a specific story.

There are other sites with online storybooks that can be read to students. Unfortunately, many of them require Flash, so they won’t work on tablets.
For older students, there are some really great news and information sites that are updated frequently. Take Wonderopolis, for example. Each day the site features a Wonder of the Day. Each wonder is an intriguing question that is answered with informational text accompanied by a related video. Each Wonder has a picture gallery, vocabulary list, short quiz, and a Listen button.
You can browse through hundreds of wonders, find a wonder by grade level and subject matter, or do a search. [Each wonder has its own URL, so you could make a link or QR code that goes directly to the story.]
CNN Student News has new 10 minute video each school day. It’s designed for use in middle and high school classrooms.
Newsela is designed to build reading comprehension with daily news stories. Every article has five different versions, from low to high Lexile levels. When you assign centers, you can indicate which level a student should select. Each level of an article has it’s own web address, so you can even send students directly to the version that you want them to read. Nesela does require the teacher to sign up for a free account, from which they then sign up their students.
PBS LearningMedia, The Kid Should See This, and Student News Daily, and Time for Kids are some other information sites written for students.

You can browse through hundreds of wonders, find a wonder by grade level and subject matter, or do a search. [Each wonder has its own URL, so you could make a link or QR code that goes directly to the story.]
Now, perhaps as part of the center’s activities, you want students to visit multiple websites. Or, maybe you want to offer students a selection of sites, articles, or videos to choose from. One handy way to collect weblinks onto one page is by making a Blendspace. You can organize web resources in one place. You can also insert text directions and quizzes right into your collection.
There are lots of other options for gathering web links onto one page. These include Symbaloo, eduClipper, and Listly. And of course if you have a website, you could create a page with links for your center.
If you have a video you want students to watch as part of the center, consider breaking up the video into clips and adding some interaction. Watching shorter clips with time for thinking and review is more effective than simply watching one long video. With Zaption you can trim a YouTube video and add pauses to the video and insert annotations and questions.
Similar to Zaption is EdPuzzle. EdPuzzle gives you editing tools that include the ability to add voice recording to the video. That’s in addition to embedding quizzes.
If your students have access to tablet for centers, then there are hundreds of thousands of apps with content that might align to the objectives for your center. It’s often hard to find those apps by searching the App Store or Google Play. Instead, try using an educational app directory or review site. I’ve had a lot of luck doing Google searches. Google for the concept or the standard along with the word app. They often lead me to a blog post by a teacher who has used the app with her students. Pinterest is also another great place to search for content specific apps. [S S]
Support Creativity
Passively reading, listening, or watching isn’t nearly as effective or engaging as doing something active. Centers work best when students are active learners. To build in accountability for the time students spend at a center, consider having students actively creating something with the content or skills they are learning or practicing at the center.
One thing students might create is a mind map. The mind map might be on paper. There are lots of free ways to make digital mind maps. Web-based options include Popplet, Google Drawings, and Slatebox. App options include Popplet, Idea Sketch, and SimpleMind.

Students could create an infopic as part of a center. An infopic is a photo or screenshot with text layered on top that is designed to communicate a message. The message might be a summary or reflection about a story, article, vocabulary word, app, experiment, or any activity, really. There are a growing number of websites and app for enhancing photos and adding text. Pixlr is a great one to get started with. It’s free and has loads of free effects. There are Pixlr apps for just about any device, and Pixlr Express is web-based and does not require any sign in to use it. Watch Learning in Hand #30 because it is all about producing infopics.

Many students may have much more to say than they can write. On Chromebooks, PCs, and Mac students can record their voices using web tools, including Vocaroo, Blabberize, Pixiclip, and ThingLink. ThingLink is also available as a mobile app.
Other iPad apps where students can record their voice include Shadow Puppet Edu, Chatterpix Kids, and Adobe Voice.
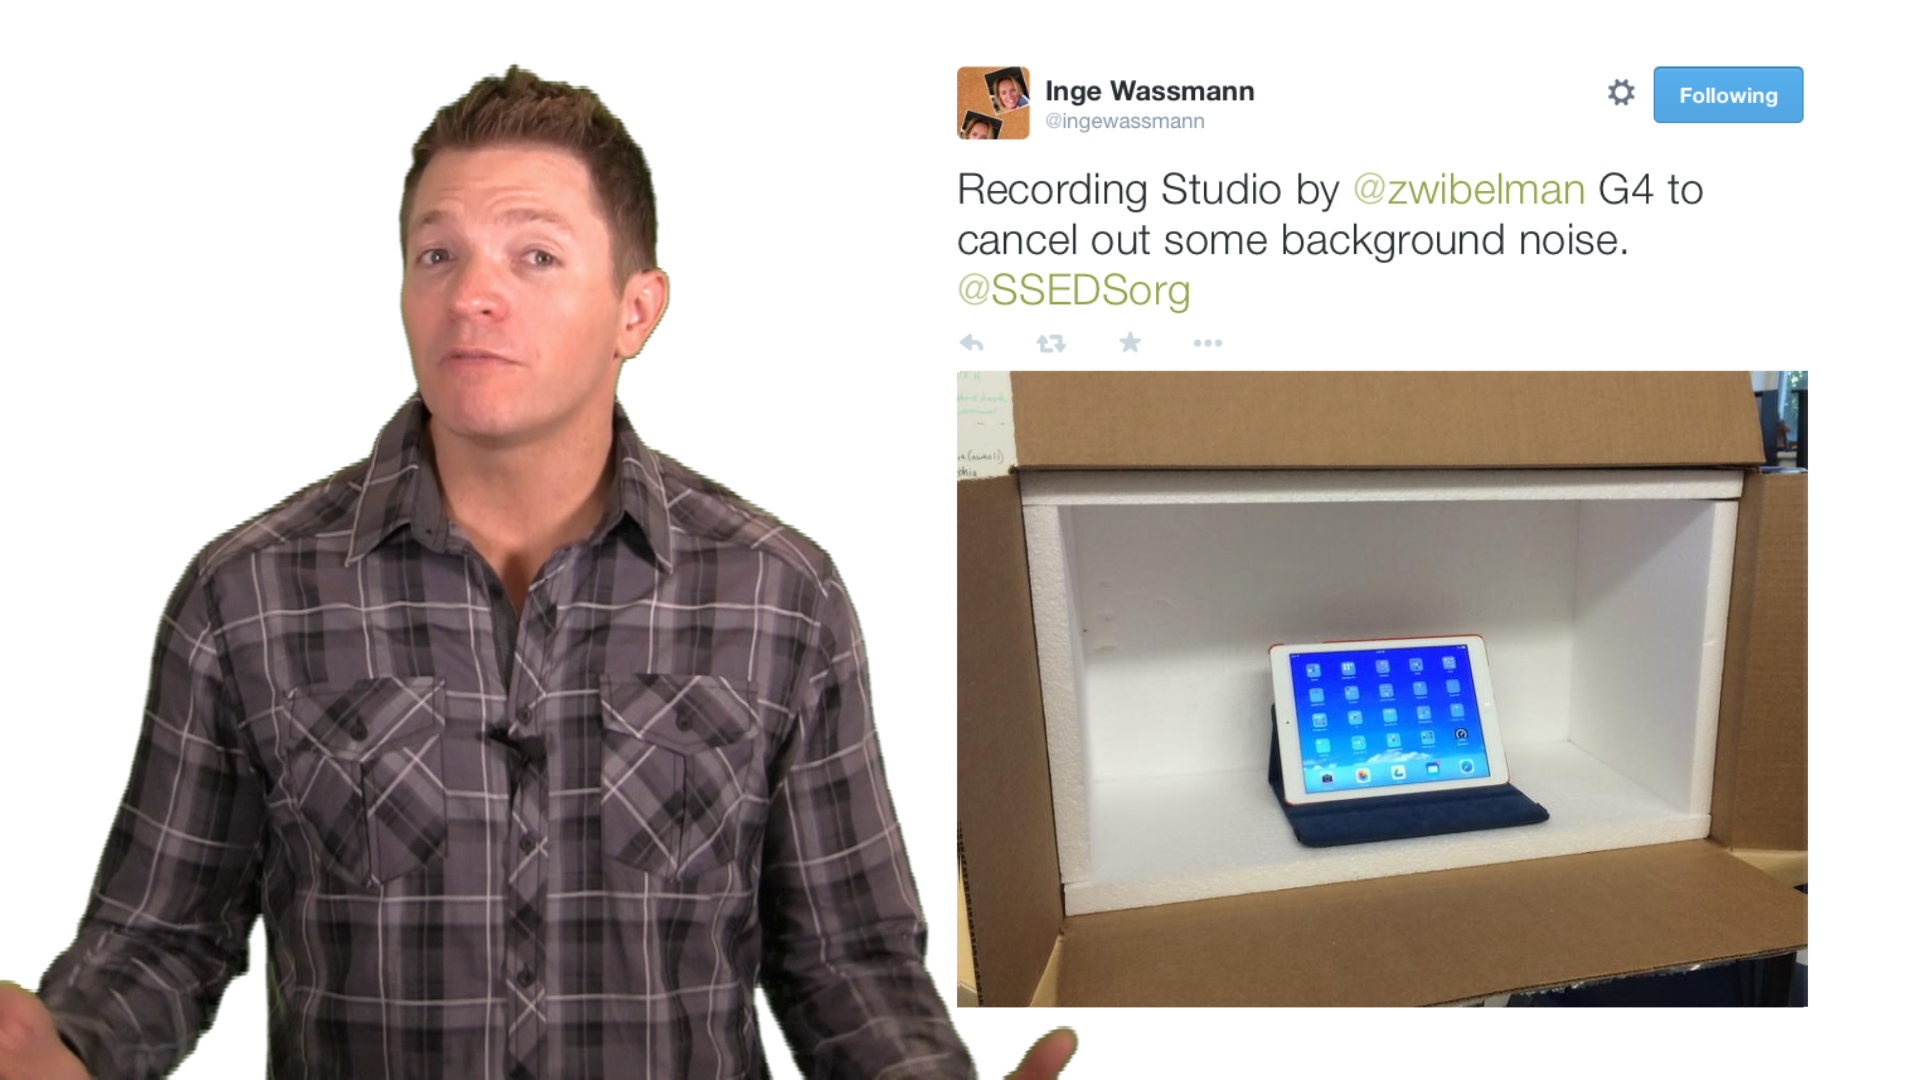
Voice recording in the classroom is tricky. During center time, chances are there’s a mini lesson happening and plenty of background noise. Maybe students can go outside the classroom to record. If that’s not possible, buy or construct your own recording booth. You can buy acoustic foam tiles online and adhere them inside of a box. Or, you can make one with styrofoam. A student can put his iPad right into the soundproofed box to reduce background noise and eliminate echoes.
To record students’ voices, you don’t even need to install an app. On mobile devices, you can keep it simple by having students record a selfie video using a mobile device’s built-in camera app.
When it comes to planning a center, you might specify a specific app or tool or give students a choice of what to create. I maintain a graphic called Show What You Know Using Web and Mobile Apps. You’ll find that there are plenty of tools students can use to creatively demonstrate their learning. The graphic is available at learninginhand.com/show.
Capture Responses
After students have created their learning artifacts, what’s next? You’ll probably want to assess it. Maybe you’ll want to share it with the rest of the class or publish it online. Let’s look at some ways to capture your students' responses.
Maybe you already use a course management system like Google Classroom, Edmodo, or Schoology? If so, that’s a great place to have students upload their files or paste links to their creations.
Or, maybe you just want students to type a reflect or summary. You can do that in a management system or use a Google Form. You can make a Google Form and share the link with students. Students do not need to log into any kind of account to complete a form. You can ask for their name or let students choose their name from a list. Then you can ask any combination of multiple choice, checkbox, scale, and open ended questions. All responses are collected into a spreadsheet. Each entry has a date and time stamp so you know exactly when it was submitted. So, you could make a very general Google Form to use with multiple centers. Or, you can go ahead and make mutilple Google Forms, one for each specific center.

You can’t upload a file to a Google Form (at least, not when I recorded this video). You can collect images, videos, files, and web links from students using Padlet. It’s a website where you create online bulletin boards. Students don’t need to sign in to use it. They just double click the background to begin a new post. You can make as many walls as you’d like, so you could have one for each center.
On a mobile device, students can instantly snap a photo and add it to a wall. This is a handy way to collect handwriting, drawings, and other physical creations that were made as part of a center.
I suggest that you set your Padlet wall to Moderate Posts so that students’ posts won’t show up until you approve them. This ways students won’t just copy what they have seen other students post. Watch Learning in Hand #26 to learn all about Padlet.
Another way to upload files without having to log in includes DropItTo.Me. It provides a web form students can use to upload into a teacher’s Dropbox account. Students will need to type in a shared password in order to upload. And, it doesn’t work to upload photos from an iPad or iPhone because those photos end up replacing each other. But, it sure is nice to have files automatically placed in Dropbox. [Hint: Have students use their name in their file’s name.]

Another way to capture student work is to put it into a blog or portfolio. Maybe your students already post to their own KidBlog? It’s a blogging platform made for teachers and students.
Seasaw is an iPad app. It’s easy for students to add artifacts by taking photos of their work or uploading files from the Camera Roll. Or, they can add drawings, notes, and web links. Students can even add voice comments to their photos to explain, clarify, or reflect on their work. The teacher will need to create a Seesaw account. Teachers add their students’ names to their account, so students never need to create an account. It’s easy for students to add their own artifacts, but the teacher can do it from her iPad as well - or, if you only have one iPad, students can borrow that iPad to capture their work.

Currently Seesaw is iPad only. Three Ring is another digital portfolio choice and supports iOS, Android, Fire, desktops, and laptops. Like Seesaw, students and teachers can capture media, including photos, videos, notes, and audio. Artifacts can be accessed in the app and online at threering.com. [Three Ring seems to no longer offer free accounts.]
As part of a center, students could contribute to a collaborative document. You could share a Google Slideshow where each student gets his or her own slide. Of course, this also works with spreadsheets and documents. After all students have rotated through a center, you have a slideshow or document with contributions from everyone in your class. [Click to see Mrs. Null’s Class ABC Book - Halloween Fun!]
Effective centers don’t require technology. Yarn, felt, sand, manipulatives, and such are awesome. But sometimes you might want to sprinkle in some tech, which can help Set the Course, Provide Content, Support Creativity, and Capture Responses.
That’s it for Episode 31. Remember, you can find my resources for sprucing up your centers at learninginhand.com/centers. And, that’s the website where you can contact me about leading a workshop at your school or event. I’d love to teach you in person! As always, thank you for supporting my work and thanks for watching.
