

Updated August 2016
Teachers and students can make their projects shine and amplify learning by illustrating ideas with photographs, drawings, symbols, and “big bang” images.
The Picture Superiority Effect (PSE) is described in Brain Rules by John Medina. Humans remember pictures a whole lot better than they remember words. Tested 72 hours after exposure to information, people remember about 10 percent of what was presented orally. If you add a photo, that figure jumps of to 65 percent.

Saving Images
To save an image you are viewing in Safari, press and hold the image until the Save button appears. Clicking Save will place a copy of the image in your Camera Roll for use in other apps.
To save an image on a Chromebook or PC, right click the image and choose to save the image somewhere where you can find it again.

When saving images, it’s best to save the largest version of the image available. You can shrink an image and it will still look great. However, enlarging a small image will look blurry.
Saving a graphic or clipart? Choose PNG (Portable Network Graphic). This file type allow for transparent backgrounds. That means you probably won’t have a white box around your image. That nice, huh?
Free Images for Your Projects


I think the best images are ones you photograph or create yourself. Then you know your work is original and that you have permission to use them. But there are times when you don’t have the time, talent, or resources to photograph or make your own. That’s when you’ll turn to the internet to use images photographed or taken by someone else.
I use Adobe Illustrator Draw (free for iOS and Android) to create my own hand-drawn illustrations (usually by tracing a photo I've taken). Watch a video about my technique.
You really shouldn’t steal any image you find online. You need permission from the copyright holder. Read 10 Bogus Excuses People Use When Stealing Photos from the Internet.
Below are websites that are great for finding clipart, photos, and icons. These sites feature images that you already have permission to use on your website, blog, poster, slideshow, video, animation, etc.
A Public Domain license means that the copyright holder has chosen to gift the work to the world. No credit or attribution is required, and you can use the image for any purpose.
Images that have a Creative Commons license don’t require you to get permission before using them. However, Creative Commons licenses usually require you to give credit to the owner of the work.
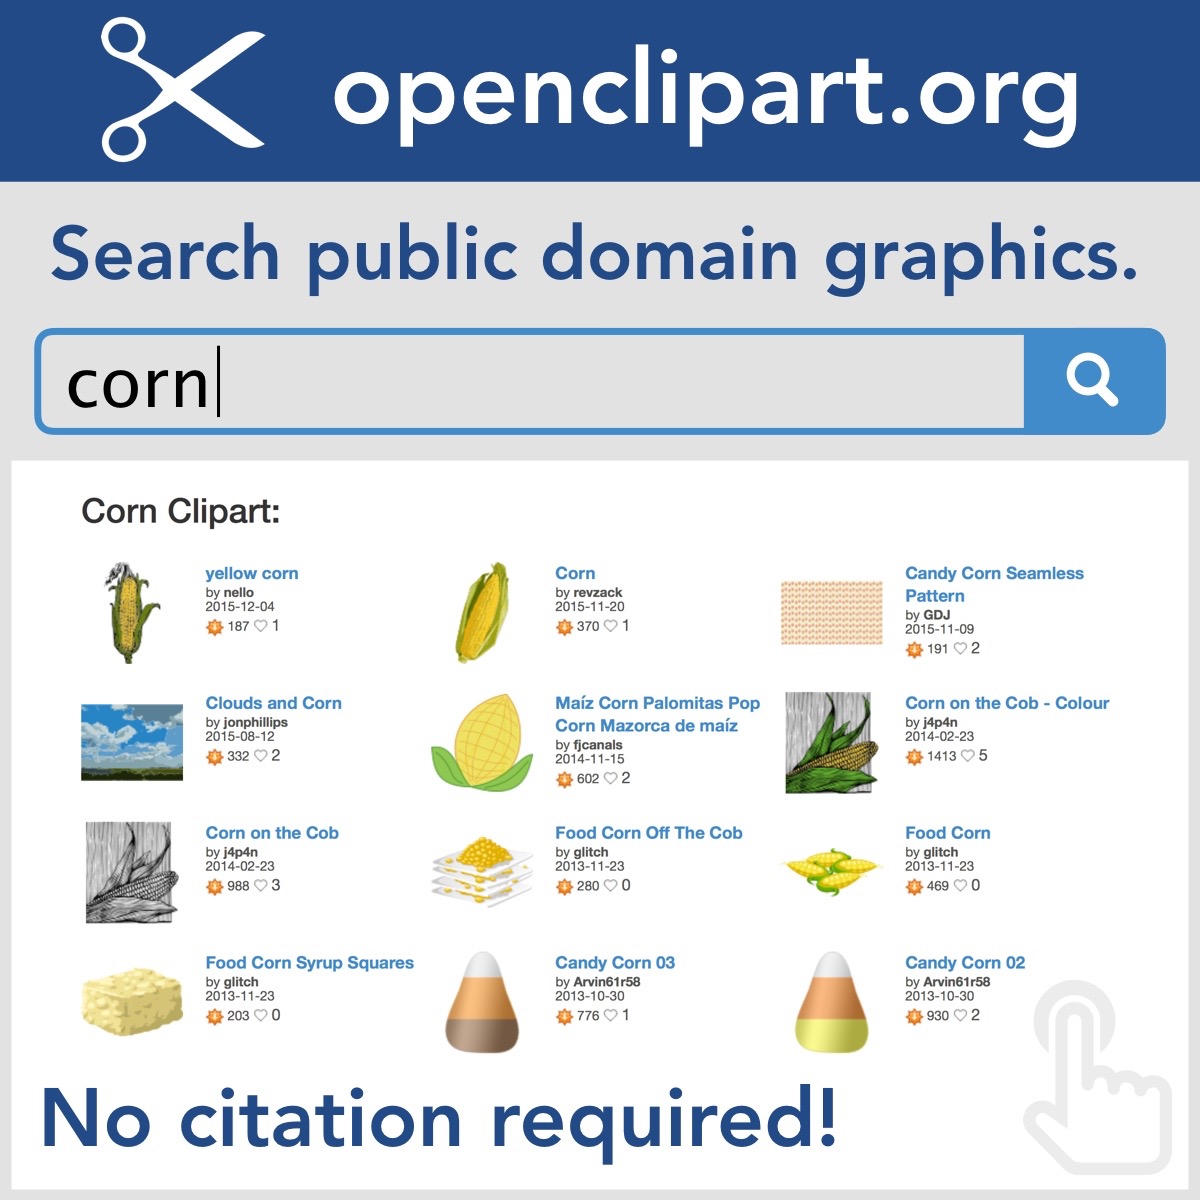
Openclipart and Pixabay have libraries full of public domain images. Remember to download the PNG version of the image from Openclipart.
Photos For Class and The Noun Project have Creative Commons images. Both sites include the attribution right on the image so that you don’t have to keep track of this separately. The Noun Project does require a free account in order to download images.
Photos for Class has a widget you can embed on your website or blog. Students can search for images right from your webpage.
While you can only download black icons from The Noun Project, there is a way to recolor them. Read how.
You can also find Creative Commons images by searching Google Images and selecting Search Tools and then Usage Rights. Choose Labeled for Reuse. You will most likely be asked to give credit to the image's owner.
Give Bing a try! Bing's image search has an option to search for public domain images. On a search results page, click License and choose Public Domain. (Come on, Google, why don't you have this option?)
Finding the right image can be a challenge. Creating a visual metaphor can be a way to illustrate an idea. Some tips for finding images to illustrate using a metaphor include:
- Searching for actions that demonstrate what you want to illustrate.
- Searching for objects, people, or animals that are associated with what you want to illustrate.
- Searching for locations where what you want to illustrate occurs.
Emojis are a free way to add visuals! There are about 900 emoji characters and they are treated like text. If your device doesn't have an emoji keyboard, you can search, copy and paste emoji characters from emojipedia.org.
A Note About the Above Video: Since I filmed this video, The Noun Project has updated and no longer requires you to download a .zip file. So just ignore the part of the video where I explain unzipping.
Tony’s Quick Tip
Create an online photo gallery for students.
If you teach young children or are short on class time, you may want to gather images for your students ahead of time. You can use the websites above to collect images into a folder on your PC. You can then upload that folder to Google Drive and share it. When students go to the web address for that folder, they are presented with a thumbnail gallery of your select images. Students can click images to view the larger versions and save them for use in their projects.

Here how to create a photo Gallery using Google Drive:
- Download a bunch of images from pixabay.com and save them into a folder on your desktop.
- Go to drive.google.com
and log in (if you aren’t logged in already). - Click the red New button and choose Folder.
- Name the folder and click Create.
- Click the new folder in the list to select it.
- Click the Share icon ( the one with a person and plus sign near the top right of the screen).
- Click Get Shareable Link. It’s best to click the shorten link box before copying.
- Copy that URL.
- Optionally, paste that URL into goqr.me to create a QR code.

Photoshop your photos without having to use photoshop!
Use PhotoFunia.com to insert images and text into their templates. It's a fast way to make your stuff appear on billboards, art galleries, and on food. Note that there are a few mature images on PhotoFunia.
Instantly apply artistic filters and effects!
Use the Prisma iOS or Android app's filters to truly make your pictures look like works of art. The app uses “a unique combination of neural networks and artificial intelligence” to turn your photos into “timeless art.” Currently it has 36 filters and no in-app purchases. You might suspect that you would have to pay to remove Prisma’s watermark—but you can disable it for free. Click the Settings gear icon, and turn off Enable Watermarks.

Producing Infopics
Since pictures are more easily retained in memory than words and grab our attention faster than text, how about we pair words with a picture to help us remember and convey information in an appealing way?

An infopic is a photo with text layered on top that is designed to communicate a message. The message might be a summary, quote, definition, notes, data, weblink, hashtag, or other informational tidbits. The information might come from a conference, workshop, activity, lesson, video, book, a conversation, etc.
Infopics are often created on a smartphone or tablet because it’s easy to snap a photo and use a combination of apps to edit, enhance, transform, and annotate the picture. But you can certainly create infopics on a Chromebook, laptop, or desktop computer.
The Pic Collage app for iOS and Android is a very popular app for making infopics. You can combine multiple photos with multiple text boxes to get your message across or demonstrate learning.
For Mac, PCs, and Chromebooks, check our QuotesCover.com and Pizap.com. These sites make it easy to add text to your photos (along with other embellishments).
Break You Own News! Upload an image and write a headline and ticker text.
Another great app for iOS, Windows, Mac, Android, and Fire is Skitch. Skitch's text has a thick contrasting color outline, which makes it readable, no matter what is behind it. Skitch also has arrows and shapes that you can place on top of an image.
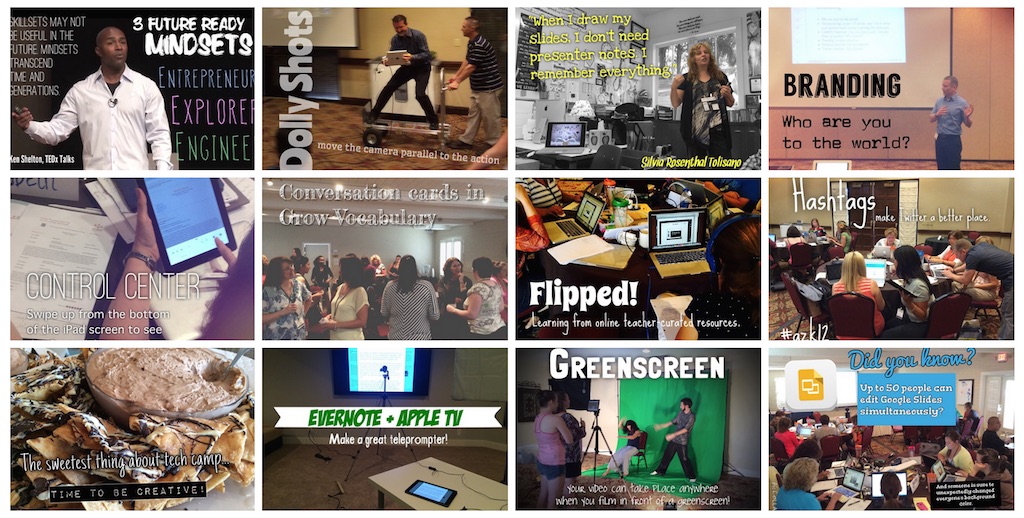
Check out a gallery of some infopics I’ve created over time.
Check out the daily infopics I post on Instagram (username is @learninginhand).
Autodesk Pixlr for iPad and iPhone and Pixlr Web (choose Pixlr Express) for PCs and Chromebooks can combine images and text to communicate a message. Pixlr has some great effects, including color splash, focal, and textures. Pixlr Web does not requires any kind of login or account, which makes it a great web-based tool for classrooms!
While you can easily add text using Pixlr, I like the font and shadow options font in Phonto for iPad and iPhone. After saving an image I’ve enhanced in Pixlr, I open that image in Phonto. Then I can givetext a slight shadow for easier readability.
Typorama is a free app for iOS (with in-app purchase). It's like Word Swag because you don't need any design skills. You insert a photo and type your text. After that, Typorama lays out the text in a variety of ways for you to choose from. You can save your creation or post it on social media. TextSwag is a free Android alternative to Typorama.

Adobe Spark Post is a free iOS app and web-based app at spark.adobe.com. It does require logging in (with Google or with an Adobe ID). Simple enter your text, choose a photo, and select a theme. What's great is that Spark Post has a built-in Creative Commons image search. Of course, you are welcome to upload your own image.
Check out some of these infopics that have posted on Twitter...
So why produce an infopic? The creator of the infopic gets to process their learning and turn it into something memorable. The infopic can be saved in Evernote, OneNote, Notability, Google Drive, or wherever a learner might keep notes. It’s more fun to look back at my notes from a conference I’ve attended when I’ve included infopics.
And, if an infopic is posted online, the audience for the infopic gets to learn something in a quick and memorable manner.
Posts that are photogenic get more attention on social media. Educators can use this to their advantage when communicating with students, parents, and each other.
Padlet

Padlet is a free website where you can create a wall and invite others to share photos on it. When you create a wall, I suggest making these modifications to its settings:
- Log into Padlet.com and create a new wall.
- Click the Modify Wall button.
- Under profile, give your wall a title and description.
- Under Layout, change from Freeform to Stream or Grid.
- Under Privacy, checkmark Moderate posts.
- Under Address, give your wall an easy to type web address.
- See the QR code under the Share menu
Canva

Canva for iPad and online for PCs gives you stylish templates that you can modify. The app and website are free, and they make money by selling you additional images. However, you are free to use your own images or images you have saved from Openclipart, Pixabay, Photos for Class, or The Noun Project. Note that the website requires you to sign up for an account before you can use it.
There are plenty of other apps and websites that are great for making infopics. Check them out at the bottom of this page.
Roving Reporter
When I taught 5th grade, my favorite daily activity was having a student roving reporter who took photos and wrote an article about what we learned that day. Now, as an alternative, what if each day or each class had a student assigned as the photographer whose job is to create and share an infopic from the lesson? By the end of the school year, the class would have a nice collection of infopics! And a great place to collect them would be on a blog or a Padlet wall!

In Conclusion
The best infopic advice I can give you is to practice and experiment. Infopics can be simple or complex. They an have very little text or quite a bit. They can take a couple minutes to produce or can take an hour. I think producing an infopic is time is well spent.